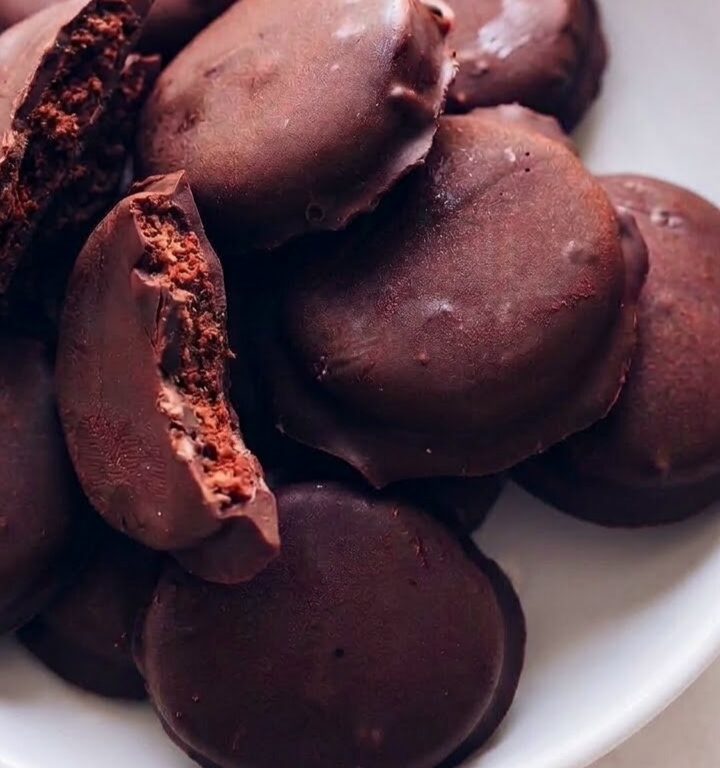
These Homemade Thin Mints are everything you love about chocolate and peppermint in one delicious, crispy cookie. Each one features a thin chocolate cookie center covered in a smooth, rich chocolate coating with a refreshing peppermint finish.
Made with almond flour, cocoa powder, maple syrup, and dark chocolate, these homemade cookies have that irresistible combination of crunchy texture and cool mint flavor. They’re also naturally dairy-free when made with vegan chocolate, making them a wonderful treat for anyone looking for vegan and gluten-free desserts.
Perfect for Christmas cookie trays, homemade gifts, or satisfying your chocolate-mint cravings, these crispy cookies are surprisingly easy to prepare. One batch makes approximately 14 chocolate-covered cookies that taste delicious chilled or at room temperature.
Why You’ll Love This Recipe
- Classic chocolate-mint flavor: Rich chocolate and refreshing peppermint create a delicious combination reminiscent of Girl Scout Thin Mints.
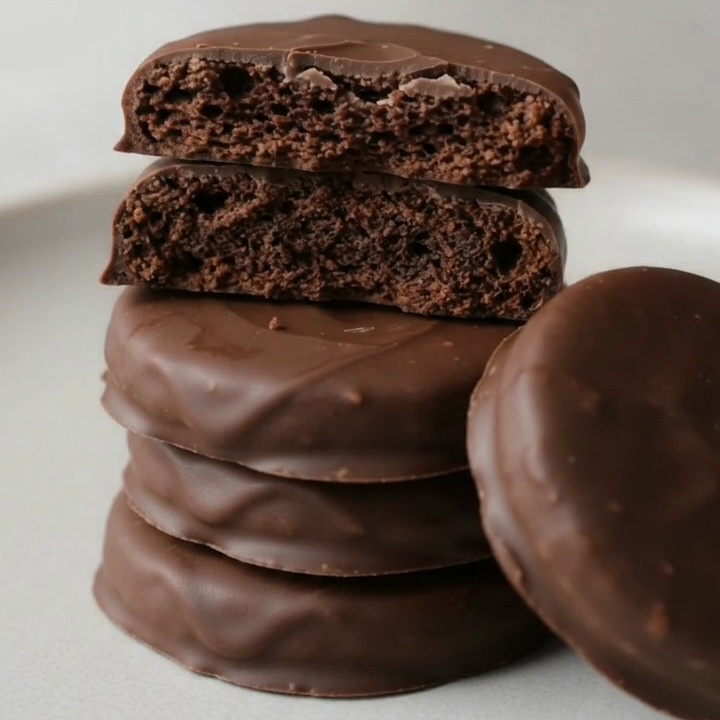
- Thin and crispy texture: The cookies are rolled to approximately ⅛ inch thick for a delicate, crisp chocolate center.
- Simple ingredients: Almond flour, cocoa powder, maple syrup, coconut oil, and chocolate come together to make these homemade treats.
- Vegan and gluten-free: The ingredients are suitable for vegan and gluten-free diets when you choose appropriately labeled products.
- Perfect for holiday gifting: These chocolate-covered mint cookies make beautiful additions to Christmas dessert trays and homemade cookie boxes.
- Freezer-friendly: The finished cookies can be stored in the freezer for up to 1 month, making them convenient for preparing ahead.
Equipment
- Food processor
- Measuring cups and spoons
- Baking sheet
- Parchment paper
- Rolling pin
- 1½–2-inch round cookie cutter
- Metal spatula
- Wire cooling rack
- Small saucepan
- Rubber spatula or wooden spoon
- Fork for dipping
- Refrigerator
- Oven
- Airtight storage container
Ingredients
These Homemade Thin Mints have two delicious components: a crispy chocolate cookie base and a smooth peppermint chocolate coating.
The cookie dough is made with almond flour, cocoa powder, and maple syrup, while melted chocolate and coconut oil create a rich outer shell.
Chocolate Cookie Base
- ¾ cup almond flour
- 3 tablespoons tapioca starch (tapioca flour)
- 2 tablespoons unsweetened cocoa powder
- ¼ teaspoon baking soda
- ⅛ teaspoon sea salt
- 2 tablespoons refined coconut oil, solid
- 2 tablespoons maple syrup
- ¼ teaspoon peppermint extract
Chocolate Peppermint Coating
- 1 cup dairy-free semi-sweet chocolate chips or chunks
- 2 teaspoons refined coconut oil
- ½ teaspoon peppermint extract
Ingredient Notes & Substitutions
Almond flour: Almond flour forms the base of these chocolate cookies and provides a delicate texture with a subtle nutty flavor. Finely ground almond flour works particularly well because it blends smoothly with the cocoa powder and tapioca starch.
Use ¾ cup of almond flour for the best consistency. A gluten-free flour blend may work as an alternative, either alone or combined with oat flour, but the texture and results may vary. Almond flour remains the most reliable choice for achieving the intended cookie consistency.
Tapioca starch: Tapioca starch, also called tapioca flour, helps bind the ingredients and contributes to the cookies’ crisp texture.
It also makes the dough easier to roll and cut without relying on traditional wheat flour. Arrowroot starch may be used as an alternative, although the finished texture can vary slightly.
Unsweetened cocoa powder: Cocoa powder gives the cookie centers their rich chocolate flavor and deep color.
Use unsweetened cocoa powder rather than sweetened hot chocolate mix. The maple syrup already provides sweetness, so additional sugar isn’t needed in the cookie dough.
Baking soda: A small amount of baking soda helps the cookies develop their texture during baking.
The recipe uses just ¼ teaspoon, which is enough to provide a little lift without making the cookies thick or cakey.
Sea salt: Sea salt balances the sweetness of the maple syrup and chocolate while enhancing the cocoa flavor.
Only ⅛ teaspoon is needed for the cookie dough.
Refined coconut oil: Refined coconut oil is used in both the cookie base and the chocolate coating.
For the dough, use 2 tablespoons of solid refined coconut oil. Its solid texture is important because it helps create a crumbly mixture before the dough comes together.
The chocolate coating uses another 2 teaspoons of refined coconut oil, which helps the melted chocolate become smooth and easier to use for dipping.
Refined coconut oil has a milder coconut flavor than unrefined coconut oil, allowing the chocolate and peppermint to stand out.
Maple syrup: Maple syrup provides sweetness and helps bring the cookie dough together.
Its liquid consistency works with the almond flour and coconut oil to create a dough that can be chilled, rolled, and cut into thin circles.
Use 2 tablespoons of pure maple syrup for the cookie base.
Peppermint extract: Peppermint extract gives these cookies their signature cool, refreshing flavor.
The recipe uses ¼ teaspoon in the cookie dough and ½ teaspoon in the chocolate coating.
Use peppermint extract rather than spearmint extract for the familiar chocolate-mint flavor.
Dairy-free semi-sweet chocolate chips: Semi-sweet chocolate creates the rich outer coating that surrounds each crispy cookie.
Choose dairy-free chocolate chips or chunks to keep the cookies vegan. High-quality chocolate that melts smoothly will produce the most even coating.
Dark chocolate can also work well if you prefer a more intense cocoa flavor.
How to Make Homemade Thin Mints
- Combine the dry ingredients. Place ¾ cup almond flour, 3 tablespoons tapioca starch, 2 tablespoons unsweetened cocoa powder, ¼ teaspoon baking soda, and ⅛ teaspoon sea salt in a food processor. Pulse several times until the ingredients are evenly combined and the mixture has a uniform chocolate color.
- Add the solid coconut oil. Add 2 tablespoons solid refined coconut oil to the food processor. Pulse until the coconut oil is distributed throughout the dry ingredients and the mixture develops a fine, crumbly texture. If the coconut oil has melted, refrigerate it briefly until solid before using.
- Form the cookie dough. Add 2 tablespoons maple syrup and ¼ teaspoon peppermint extract. Continue pulsing until the mixture begins to come together and forms a cohesive chocolate cookie dough. The dough should hold together when pressed.
- Chill the dough. Shape the cookie dough into a flat disc and wrap it in parchment paper. Place it in the refrigerator for at least 15 minutes to firm up. Chilling makes the dough easier to roll without sticking or breaking.
- Preheat the oven. Preheat your oven to 350°F (176°C). Line a baking sheet with parchment paper and set it aside.
- Prepare the rolling surface. Lightly dust a clean sheet of parchment paper with tapioca starch. Place the chilled cookie dough on the prepared surface and sprinkle a little additional tapioca starch over the top to prevent sticking.
- Roll the dough thinly. Using a rolling pin, roll the dough into an even layer approximately ⅛ inch thick. Try to maintain a consistent thickness throughout so the cookies bake evenly and develop their signature crispy texture.
- Cut the cookies into circles. Using a 1½–2-inch round cookie cutter, cut the dough into approximately 14 circles. Gather the remaining dough scraps, roll them out again, and continue cutting until all the dough has been used.
- Transfer the cookies to the baking sheet. Lightly dust a metal spatula with tapioca starch and carefully lift each cookie round onto the prepared baking sheet. Leave approximately 1–2 inches of space between the cookies.
- Bake the chocolate cookies. Place the baking sheet in the preheated oven and bake for 8–10 minutes, or until the cookies appear slightly puffed, expanded, and dry on the surface. Avoid overbaking, as the thin cookies can become too hard.
- Cool the cookies completely. Remove the baking sheet from the oven and allow the cookies to cool slightly. Carefully transfer them to a wire cooling rack and let them cool completely before dipping. This helps keep the chocolate coating from becoming too warm or uneven.
- Prepare the chocolate coating. In a small saucepan over low heat, combine 1 cup dairy-free semi-sweet chocolate chips or chunks and 2 teaspoons refined coconut oil.
- Melt the chocolate gently. Stir continuously until the chocolate is approximately halfway melted. Remove the saucepan from the heat and continue stirring until the remaining chocolate melts and the mixture becomes completely smooth. The residual heat will help finish melting the chocolate without overheating it.
- Add the peppermint extract. Stir ½ teaspoon peppermint extract into the melted chocolate until evenly incorporated. The coating should be smooth, rich, and fragrant with peppermint.
- Dip the cooled cookies. Once the cookies have cooled completely, carefully dip each one into the melted peppermint chocolate. Gently turn the cookie until it is fully coated on all sides, including the edges.
- Remove excess chocolate. Using a fork, lift each chocolate-covered cookie from the melted chocolate and gently tap off any excess coating. Allow the extra chocolate to drip back into the saucepan for a smoother, more even finish.
- Arrange the coated cookies. Place the chocolate-covered cookies on a parchment-lined baking sheet or large plate. Leave a little space between each cookie to prevent the coatings from sticking together.
- Refrigerate until set. Transfer the cookies to the refrigerator for approximately 15 minutes, or until the chocolate coating has completely hardened.
- Serve and enjoy. Once the chocolate is firm, your Homemade Thin Mints are ready to enjoy. Serve them chilled for a cool, crisp chocolate-mint treat or allow them to reach room temperature before serving.
Tips for Success
- Keep the coconut oil solid for the dough. The 2 tablespoons of coconut oil used in the cookie base should be solid rather than melted. This helps create the crumbly texture needed before the maple syrup brings the dough together.
- Don’t skip chilling the dough. Refrigerating the dough for at least 15 minutes makes it firmer and easier to roll into thin circles without tearing.
- Roll the cookies evenly. Aim for approximately ⅛ inch thickness. Thin, evenly rolled cookies are essential for achieving the delicate, crispy center that makes Thin Mints so delicious.
- Use tapioca starch to prevent sticking. Lightly dust the parchment paper, dough, and metal spatula with tapioca starch. This makes rolling, cutting, and transferring the cookies easier.
- Watch the cookies while baking. The cookies only need 8–10 minutes at 350°F. Remove them when the surface looks dry and the cookies have slightly puffed.
- Melt the chocolate over low heat. Remove the saucepan from the heat once the chocolate is halfway melted, then continue stirring until smooth. This gentle method helps prevent scorching.
- Cool before dipping. Make sure the baked cookies are completely cool before coating them. Warm cookies can affect the chocolate coating and make dipping more difficult.
Variations
These optional variations are delicious ways to customize your Homemade Thin Mints with different chocolate flavors and decorative finishes.
- Dark chocolate Thin Mints: Replace the semi-sweet chocolate chips with dairy-free dark chocolate for a richer coating with a more intense cocoa flavor.
- Extra peppermint chocolate cookies: For a stronger mint flavor, use a small additional amount of peppermint extract in the chocolate coating. Add it gradually, since peppermint extract is concentrated and can easily overpower the chocolate.
- Chocolate-drizzled Thin Mints: Once the dipped cookies have set, drizzle a little leftover melted peppermint chocolate over the top for a decorative finish.
- Holiday chocolate mint cookies: Sprinkle a small amount of finely crushed peppermint candy over the freshly dipped cookies before the coating hardens. Choose vegan candy if needed to keep the cookies dairy-free and plant-based.
- Mint chocolate cups: Pour any leftover melted peppermint chocolate into mini muffin liners and refrigerate until firm. These little chocolate cups make a delicious additional treat without wasting the extra coating.
How to Store
Homemade Thin Mints are easy to store, making them a convenient choice for preparing ahead of holidays, parties, or whenever you’re craving chocolate and peppermint.
Refrigerator Storage
Once the chocolate coating has completely hardened, transfer the cookies to a covered, airtight container.
If stacking them, place parchment paper between the layers to prevent the chocolate coatings from sticking together.
Store the cookies in the refrigerator for up to 1 week.
You can enjoy them directly from the refrigerator for a cool, crisp chocolate-mint treat or allow them to come to room temperature before serving.
Freezer Storage
These homemade chocolate mint cookies are also freezer-friendly.
Arrange the completely set cookies in a freezer-safe airtight container, placing parchment paper between layers if needed.
Store in the freezer for up to 1 month.
Keeping the cookies properly sealed helps protect their texture and prevents them from absorbing odors from other frozen foods.
Thawing and Serving
For a firm, chilled treat, enjoy the cookies after allowing them to soften slightly in the refrigerator.
You can also thaw them in their covered container in the refrigerator before serving at room temperature.
Avoid leaving the chocolate-covered cookies in a hot environment, as the coating may soften.
Make-Ahead Preparation
Homemade Thin Mints are a wonderful make-ahead dessert for Christmas celebrations, holiday cookie exchanges, and homemade gifts.
Prepare the cookies, coat them in peppermint chocolate, and refrigerate until the coating has hardened completely.
Once set, transfer them to an airtight container and store them in the refrigerator or freezer until you’re ready to serve.
Serving Suggestions
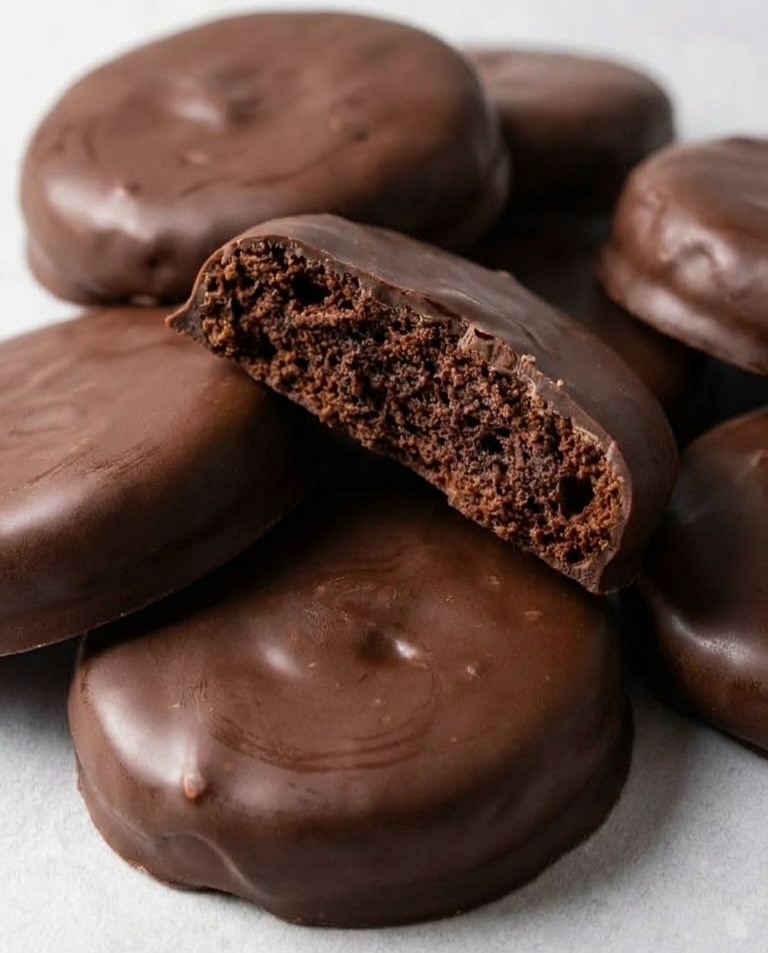
These crispy chocolate mint cookies are delicious on their own, but their rich chocolate coating and refreshing peppermint flavor also make them easy to pair with other treats.
- Christmas cookie trays: Arrange the Thin Mints alongside sugar cookies, homemade fudge, and other festive sweets for a beautiful holiday dessert platter.
- Homemade holiday gifts: Package the completely set cookies in decorative tins or candy boxes, with parchment paper between layers to protect the chocolate coating.
- After-dinner treats: Serve a few Thin Mints after dinner for a refreshing chocolate and peppermint dessert.
- Coffee and tea: Pair the cookies with hot coffee, espresso, or tea for a delicious contrast between the warm drink and cool mint flavor.
- Ice cream desserts: Crumble the cookies over your favorite dairy-free vanilla or chocolate ice cream for extra crunch and peppermint flavor.
- Cookie assortments: Include them in a homemade cookie box with peanut butter cookies, chocolate cookies, and other bite-sized treats.
Because the recipe makes approximately 14 cookies, it’s a convenient batch for sharing with family or preparing a small holiday gift.
Frequently Asked Questions
What are Homemade Thin Mints?
Homemade Thin Mints are thin, crispy chocolate cookies covered in a smooth peppermint-flavored chocolate coating.
They combine a delicate cocoa cookie center with rich chocolate and refreshing mint flavor, creating a delicious homemade treat reminiscent of classic Girl Scout Thin Mints.
Are Homemade Thin Mints vegan and gluten-free?
Yes, these cookies can be both vegan and gluten-free.
The cookie base uses almond flour, tapioca starch, coconut oil, and maple syrup instead of traditional wheat flour, butter, or eggs.
Choose certified gluten-free ingredients where necessary and dairy-free chocolate chips to keep the recipe suitable for vegan and gluten-free diets.
Can I use a different flour instead of almond flour?
Almond flour is recommended for the best texture.
A gluten-free flour blend, either alone or combined with oat flour, may work as an alternative, but the results can vary because different flours absorb moisture differently.
Arrowroot starch may also be substituted for tapioca starch, although the cookie texture may change slightly.
Why aren’t my Thin Mints crispy?
The cookies may be too thick or may need more time to cool completely.
Roll the dough to approximately ⅛ inch thick and bake at 350°F for 8–10 minutes, until the cookies appear slightly puffed and dry on the surface.
Allow them to cool completely before dipping. The thin cookies develop a firmer texture as they cool.
Can I melt the chocolate in the microwave?
Yes. The chocolate and coconut oil can also be melted in the microwave.
Heat in 30-second intervals, stirring thoroughly between each interval, until the mixture becomes smooth.
Avoid overheating the chocolate, and stir in the peppermint extract after melting.
Can I freeze Homemade Thin Mints?
Yes. Homemade Thin Mints can be stored in the freezer for up to 1 month.
Make sure the chocolate coating has completely hardened before placing the cookies in a freezer-safe airtight container.
Separate layers with parchment paper to prevent sticking, and thaw in the refrigerator when you’re ready to enjoy them.
Recipe Card

Homemade Thin Mints
Equipment
- Food processor
- Measuring cups and spoons
- Baking sheet
- Parchment paper
- Rolling Pin
- 1½–2-inch round cookie cutter
- Metal spatula
- Wire cooling rack
- Small saucepan
- Rubber spatula or wooden spoon
- Fork for dipping
- Refrigerator
- Oven
Ingredients
Chocolate Cookie Base
- ¾ cup almond flour
- 3 tablespoons tapioca starch tapioca flour
- 2 tablespoons unsweetened cocoa powder
- ¼ teaspoon baking soda
- ⅛ teaspoon sea salt
- 2 tablespoons refined coconut oil solid
- 2 tablespoons maple syrup
- ¼ teaspoon peppermint extract
Chocolate Peppermint Coating
- 1 cup dairy-free semi-sweet chocolate chips or chunks
- 2 teaspoons refined coconut oil
- ½ teaspoon peppermint extract
Instructions
- Place the almond flour, tapioca starch, cocoa powder, baking soda, and sea salt in a food processor. Pulse several times until the dry ingredients are evenly combined.
- Add the solid refined coconut oil and pulse until the mixture develops a fine, crumbly texture. If the coconut oil has melted, refrigerate it briefly until solid before adding it.
- Pour in the maple syrup and ¼ teaspoon peppermint extract. Continue pulsing until the ingredients begin to come together and form a cookie dough.
- Shape the dough into a flat disc, wrap it in parchment paper, and refrigerate for at least 15 minutes to firm up.
- Preheat the oven to 350°F (176°C). Line a baking sheet with parchment paper and set aside.
- Lightly dust a clean sheet of parchment paper with tapioca starch. Place the chilled cookie dough on the prepared surface and sprinkle a little additional tapioca starch over the top.
- Using a rolling pin, roll the dough into a thin, even layer approximately ⅛ inch thick.
- Using a 1½–2-inch round cookie cutter, cut the dough into approximately 14 circles. Gather any remaining scraps, roll them out again, and continue cutting until all the dough has been used.
- Lightly dust a metal spatula with tapioca starch and carefully transfer the cookie rounds onto the prepared baking sheet. Leave approximately 1–2 inches of space between each cookie.
- Bake for 8–10 minutes, or until the cookies appear slightly puffed, expanded, and dry on the surface.
- Remove the baking sheet from the oven. Allow the cookies to cool slightly before transferring them to a wire cooling rack. Let them cool completely before coating.
- In a small saucepan over low heat, combine the semi-sweet chocolate chips and 2 teaspoons refined coconut oil.
- Stir continuously until the chocolate is approximately halfway melted. Remove the saucepan from the heat and continue stirring until the remaining chocolate melts and the mixture becomes completely smooth.
- Add the remaining ½ teaspoon peppermint extract and stir until evenly incorporated into the melted chocolate.
- Once the cookies have cooled completely, dip each one into the peppermint chocolate mixture, gently turning until fully coated on all sides.
- Using a fork, lift each coated cookie out of the chocolate and gently tap off any excess coating.
- Arrange the chocolate-covered cookies on a parchment-lined baking sheet or large plate.
- Refrigerate for approximately 15 minutes, or until the chocolate coating has completely hardened.
- Once set, serve the Homemade Thin Mints chilled or at room temperature.