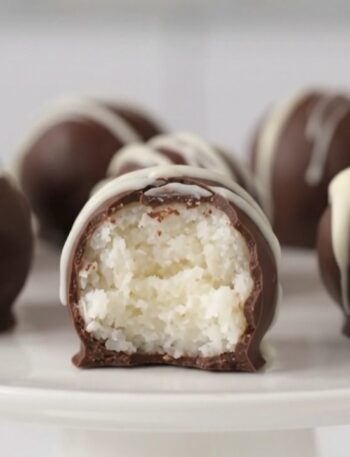
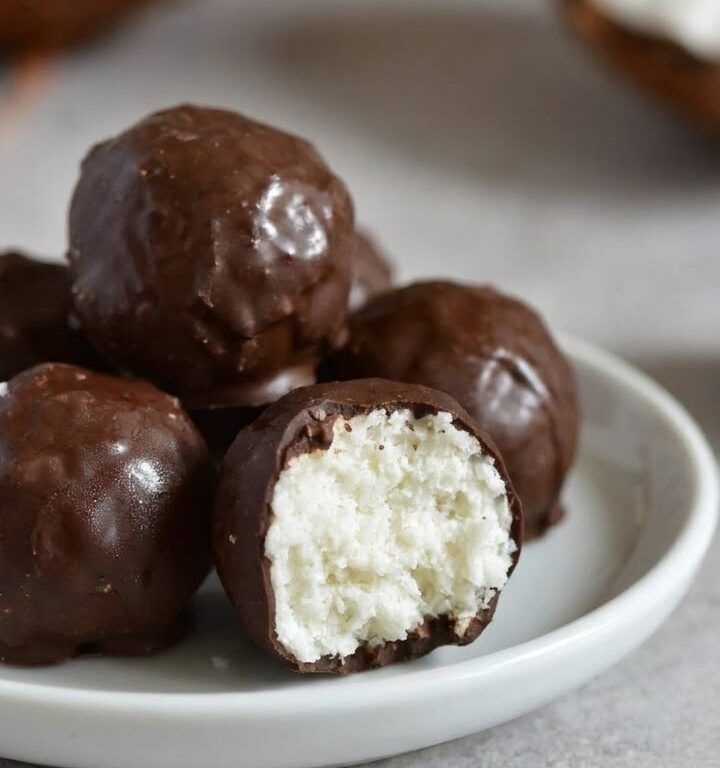
These 3-Ingredient Chocolate Coconut Balls are a delicious homemade treat with a soft, chewy coconut center and a rich dark chocolate coating. Every bite combines the sweet, creamy flavor of coconut with a smooth chocolate shell, creating a simple candy that’s hard to resist.
The best part? You only need three ingredients and no baking to make them. The coconut filling comes together in minutes, then gets rolled into bite-sized balls, chilled, and dipped in melted chocolate.
These easy chocolate coconut candies are perfect for Christmas dessert trays, holiday parties, homemade gifts, or whenever you’re craving something sweet. With approximately 20 minutes of preparation and a batch that makes 25 candies, they’re a convenient treat to make ahead and share.
Why You’ll Love This Recipe
- Only three ingredients: Unsweetened shredded coconut, sweetened condensed milk, and dark chocolate are all you need.
- No baking required: These homemade coconut candies come together without turning on the oven.
- Delicious chocolate and coconut flavor: Rich dark chocolate balances the sweetness of the creamy coconut filling.
- Soft and chewy texture: The coconut center stays pleasantly chewy beneath a smooth chocolate coating.
- Perfect for holiday gifting: These bite-sized candies are a lovely addition to Christmas treat boxes and dessert trays.
- Easy to make ahead: The finished coconut balls can be refrigerated or frozen until you’re ready to enjoy them.
Equipment
- Large mixing bowl
- Measuring cups and spoons
- Spoon or fork for mixing
- Baking sheet
- Parchment paper
- Microwave-safe bowl
- Microwave or double boiler
- Fork or candy dipping tool
- Wire cooling rack
- Refrigerator
- Freezer, optional
- Airtight storage container
Ingredients
These easy Chocolate Coconut Balls require just three simple ingredients. The sweet coconut filling is made with shredded coconut and condensed milk, while melted dark chocolate creates a rich outer coating.
Coconut Filling
- 2 cups unsweetened shredded coconut
- 1 cup sweetened condensed milk or sweetened condensed coconut milk
Chocolate Coating
- 3.5 oz dark chocolate or chocolate chips, for melting
Ingredient Notes & Substitutions
Unsweetened shredded coconut: Unsweetened shredded coconut gives these homemade candies their signature flavor and chewy texture. It combines with the condensed milk to create a thick, sticky filling that can be shaped into balls.
Using unsweetened coconut helps balance the sweetness of the condensed milk and chocolate coating. Finely shredded coconut works especially well because the smaller pieces stick together more easily.
Sweetened shredded coconut will make the filling noticeably sweeter and may change its consistency, so unsweetened coconut is recommended.
Sweetened condensed milk: Sweetened condensed milk provides sweetness and helps bind the shredded coconut into a soft, cohesive mixture.
Its thick, sticky texture is essential for shaping the filling into compact balls that hold together during chilling and dipping.
Be sure to use sweetened condensed milk rather than evaporated milk. Evaporated milk is thinner and doesn’t contain the same amount of sugar.
For a dairy-free alternative, use sweetened condensed coconut milk. It provides a similar sweetness while complementing the coconut flavor. Choose dairy-free chocolate as well if you’re avoiding dairy.
Dark chocolate: Dark chocolate creates a rich outer coating that contrasts beautifully with the sweet coconut filling.
The recipe uses 3.5 ounces of dark chocolate or chocolate chips. Choose a chocolate that melts smoothly and has a flavor you enjoy.
Dark chocolate is particularly delicious because its deeper cocoa flavor balances the sweetness of the coconut center.
Milk chocolate or white chocolate can also be used as optional variations, although they will create a sweeter finished candy.
How to Make 3-Ingredient Chocolate Coconut Balls
- Prepare the shredded coconut. Place 2 cups unsweetened shredded coconut in a large mixing bowl. Break apart any large clumps so the coconut can combine evenly with the condensed milk.
- Add the condensed milk. Pour 1 cup sweetened condensed milk over the shredded coconut. Using a spoon, fork, or your hands, mix thoroughly until the coconut is evenly coated and a thick, sticky mixture forms. The filling should hold together when gently pressed.
- Shape the coconut balls. Scoop approximately 1–2 tablespoons of the coconut mixture for each portion. Roll it between your palms to form a smooth, compact ball. Keep the balls small enough to enjoy in approximately two or three bites.
- Arrange on a baking sheet. Line a baking sheet with parchment paper and place the shaped coconut balls on top, leaving a little space between each one. Continue until all the coconut mixture has been used, making approximately 25 balls.
- Chill the coconut filling. Transfer the baking sheet to the refrigerator for 15–30 minutes, or until the coconut balls become firm enough to handle without losing their shape. If you’re short on time, place them in the freezer for 5–10 minutes instead.
- Prepare the chocolate coating. While the coconut balls are chilling, place 3.5 oz dark chocolate or chocolate chips in a microwave-safe bowl.
- Melt the chocolate. Microwave in 20–30-second intervals, stirring thoroughly after each interval, until the chocolate is completely melted and smooth. Alternatively, melt the chocolate gently using a double boiler. The finished chocolate should be smooth enough to coat the coconut balls evenly.
- Dip the chilled coconut balls. Remove the coconut balls from the refrigerator or freezer. Using a fork or spoon, carefully dip each ball into the melted chocolate, gently turning it until completely coated on all sides.
- Remove the excess chocolate. Lift each chocolate-covered coconut ball out of the melted chocolate and allow the excess to drip back into the bowl. This helps create a smooth, even coating without a thick layer of chocolate collecting underneath.
- Transfer to a cooling rack. Carefully place the coated coconut balls on a wire cooling rack with parchment paper underneath to catch any chocolate drips. Leave a little space between the candies so the coatings don’t touch.
- Allow the chocolate to harden. Let the chocolate coating set at room temperature until it has hardened completely. Avoid handling the coconut balls while the chocolate is still soft.
- Refrigerate until chilled. Once the chocolate coating has set, transfer the coconut balls to the refrigerator until completely chilled.
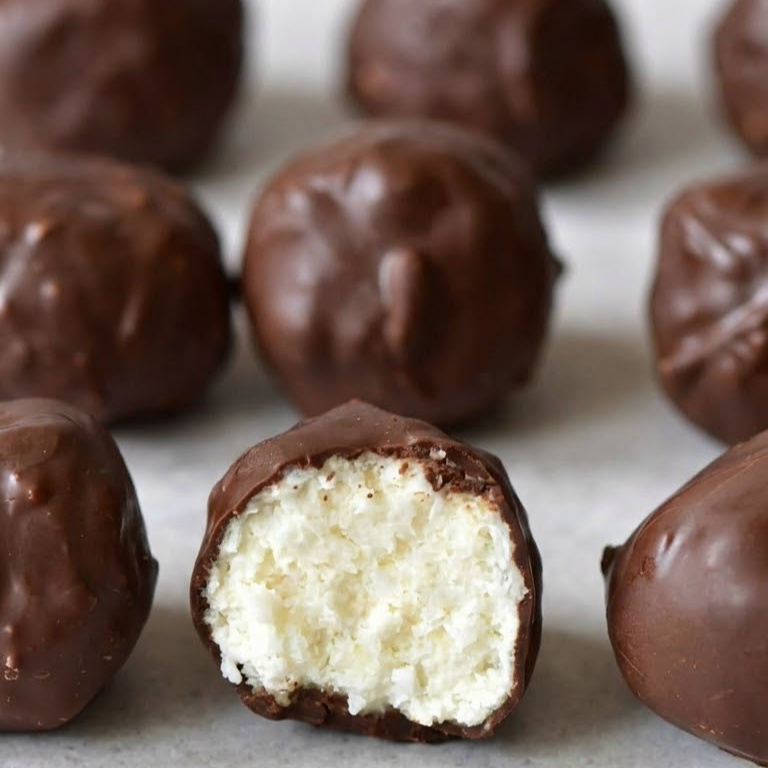
- Serve and enjoy. Serve the Chocolate Coconut Balls chilled for a delicious combination of chewy coconut filling and rich chocolate coating.
Tips for Success
- Use unsweetened shredded coconut. Unsweetened coconut balances the sweetness of the condensed milk and helps prevent the finished candies from becoming overly sweet.
- Mix the filling thoroughly. Make sure every piece of coconut is coated with condensed milk. The mixture should be thick, sticky, and cohesive enough to hold together when rolled.
- Keep the coconut balls small. Use approximately 1–2 tablespoons of filling per ball. Smaller portions are easier to shape, chill, and dip into melted chocolate.
- Chill before dipping. Refrigerate the shaped coconut balls for 15–30 minutes, or freeze for 5–10 minutes, to help them maintain their shape when coated.
- Melt the chocolate gradually. Use short microwave intervals and stir thoroughly between each one. Avoid overheating the chocolate, which can make it thick or grainy.
- Remove excess chocolate after dipping. Let the extra chocolate drip back into the bowl before placing the candies on the cooling rack. This creates a neater coating and prevents excessive chocolate pooling.
- Allow the coating to set completely. Let the chocolate harden before refrigerating the finished candies. This helps preserve their smooth appearance and makes them easier to handle.
Variations
These optional variations are delicious ways to customize your homemade Chocolate Coconut Balls with different flavors, coatings, and decorations.
- Milk chocolate coconut balls: Replace the dark chocolate with milk chocolate for a sweeter, creamier outer coating. This variation is especially nice for anyone who prefers a milder chocolate flavor.
- White chocolate coconut balls: Use white chocolate instead of dark chocolate for a sweeter finish. You can also decorate the white coating with a small amount of food coloring specifically designed for chocolate.
- Sea salt chocolate coconut balls: Sprinkle a small amount of flaky sea salt over the freshly dipped candies before the chocolate sets. The salt adds a delicious contrast to the sweet coconut filling.
- Vanilla coconut balls: Add a little vanilla extract to the coconut and condensed milk mixture for a subtle vanilla flavor that complements the chocolate.
- Double chocolate coconut balls: Allow the first chocolate coating to harden completely, then dip each coconut ball into melted chocolate a second time for a thicker, richer outer shell.
How to Store
Chocolate Coconut Balls are easy to prepare ahead of time and store for later. Keeping them in an airtight container helps protect their chewy coconut filling and chocolate coating.
Room Temperature Storage
Once the chocolate coating has completely hardened, place the coconut balls in an airtight container.
Store them in a cool, dry place away from direct sunlight and heat for up to 5 days.
If your kitchen is warm, the chocolate coating may soften, so refrigeration is the better option for maintaining their shape.
Refrigerator Storage
Transfer the finished coconut balls to an airtight container and refrigerate for up to 2 weeks.
If stacking the candies, place parchment paper between the layers to prevent the chocolate coatings from sticking together.
Refrigeration helps keep the coconut filling firm and the chocolate coating intact.
For the best texture, serve the candies chilled.
Freezer Storage
Chocolate Coconut Balls can also be frozen for 2–3 months.
Make sure the chocolate coating has completely set before transferring the candies to a freezer-safe airtight container or resealable freezer bag.
If storing several layers, separate them with parchment paper to protect the chocolate coating.
Thawing and Serving
When you’re ready to enjoy frozen chocolate coconut balls, transfer the desired number to the refrigerator and allow them to thaw while covered.
Serve chilled for a firm chocolate shell and a pleasantly chewy coconut center.
Make-Ahead Preparation
These candies are convenient to make ahead for parties, holiday celebrations, or homemade gifts.
Prepare the coconut filling, dip the balls in chocolate, and allow the coating to set completely before storing.
Keep them refrigerated until you’re ready to arrange them on a dessert platter or package them for gifting.
Serving Suggestions
These Chocolate Coconut Balls are delicious on their own, but their bite-sized shape also makes them perfect for dessert trays, celebrations, and homemade candy assortments.
- Christmas dessert trays: Arrange the chocolate coconut balls alongside Christmas cookies, homemade fudge, and other festive candies.
- Homemade holiday gifts: Package the fully set candies in decorative boxes or candy tins for a sweet handmade present.
- Birthday parties: Serve the coconut balls in small paper candy cups for an attractive, easy-to-handle party dessert.
- After-dinner treats: Enjoy one or two chilled coconut balls as a simple chocolate dessert after a meal.
- Coffee and tea: Pair these chewy coconut candies with a warm cup of coffee or tea for an afternoon treat.
- Homemade candy assortments: Combine them with chocolate truffles, peanut butter balls, and other bite-sized sweets for a variety of flavors and textures.
With approximately 25 candies per batch, this recipe is a convenient choice for sharing with family and friends.
Frequently Asked Questions
What are Chocolate Coconut Balls made of?
Chocolate Coconut Balls are simple no-bake candies made with shredded coconut, sweetened condensed milk, and melted chocolate.
The coconut and condensed milk form a thick, chewy filling that’s rolled into small balls, chilled, and completely coated in smooth dark chocolate.
Can I use sweetened shredded coconut instead of unsweetened coconut?
Unsweetened shredded coconut is recommended because the condensed milk already provides plenty of sweetness.
Sweetened shredded coconut can make the candies significantly sweeter and may affect the filling’s consistency.
For the best balance of flavor and texture, use unsweetened shredded coconut.
Can I make these Chocolate Coconut Balls dairy-free?
Yes. Replace the regular sweetened condensed milk with sweetened condensed coconut milk and choose dairy-free dark chocolate.
Be sure to check the chocolate’s ingredient label, since some dark chocolate products contain milk ingredients.
The coconut filling and chocolate coating can both be prepared using dairy-free ingredients.
Why are my coconut balls falling apart?
The coconut mixture may not have been mixed thoroughly enough, or the balls may not have been pressed firmly during shaping.
Make sure the shredded coconut is evenly coated with condensed milk and that the mixture holds together when pressed.
Roll each portion into a compact ball, then refrigerate for 15–30 minutes or freeze for 5–10 minutes before dipping.
Can I use milk chocolate instead of dark chocolate?
Yes. Milk chocolate is a delicious alternative if you prefer a sweeter chocolate coating.
Dark chocolate provides a richer contrast to the sweet coconut filling, while milk chocolate creates a creamier, sweeter candy.
White chocolate can also be used for a different flavor and appearance.
Can I freeze Chocolate Coconut Balls?
Yes. These homemade candies can be frozen for 2–3 months.
Allow the chocolate coating to set completely, then transfer the candies to a freezer-safe airtight container or resealable freezer bag.
Thaw them in the refrigerator before serving for the best texture.
Recipe Card

3-Ingredient Chocolate Coconut Balls
Equipment
- Large mixing bowl
- Measuring cups and spoons
- Spoon or fork
- Baking sheet
- Parchment paper
- Microwave-safe bowl
- Microwave or double boiler
- Fork or candy dipping tool
- Wire cooling rack
- Refrigerator
- Freezer, optional
- Airtight storage container
Ingredients
Coconut Filling
- 2 cups unsweetened shredded coconut
- 1 cup sweetened condensed milk or sweetened condensed coconut milk
Chocolate Coating
- 3.5 oz dark chocolate or chocolate chips for melting
Instructions
- Place the unsweetened shredded coconut in a large mixing bowl.
- Add the sweetened condensed milk to the coconut. Using a spoon, fork, or your hands, mix thoroughly until the ingredients are fully combined and a thick, sticky coconut mixture forms.
- Scoop approximately 1–2 tablespoons of the coconut mixture for each portion. Roll between your palms to form smooth, compact balls, keeping them small enough to enjoy in about 2–3 bites.
- Line a baking sheet with parchment paper and arrange the coconut balls on the prepared surface, leaving a little space between each one.
- Transfer the baking sheet to the refrigerator for 15–30 minutes, or until the coconut balls become firm enough to handle. For quicker results, freeze for 5–10 minutes.
- While the coconut balls are chilling, place the dark chocolate or chocolate chips in a microwave-safe bowl.
- Microwave in 20–30-second intervals, stirring thoroughly after each interval, until the chocolate is completely melted and smooth. Alternatively, melt the chocolate using a double boiler.
- Remove the chilled coconut balls from the refrigerator or freezer. Using a fork or spoon, dip each coconut ball into the melted chocolate, gently turning until completely coated on all sides.
- Lift each chocolate-covered coconut ball out of the melted chocolate, allowing the excess chocolate to drip back into the bowl.
- Carefully transfer the coated coconut balls onto a wire rack with parchment paper underneath to catch any chocolate drips.
- Allow the chocolate coating to harden at room temperature.
- Once the chocolate has set, transfer the coconut balls to the refrigerator until completely chilled.
- Serve the Chocolate Coconut Balls chilled and enjoy.