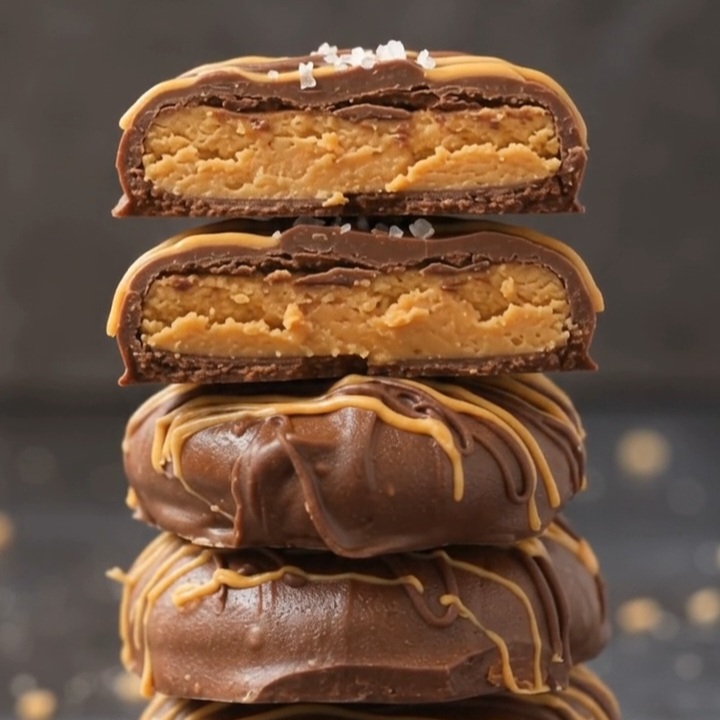
These chocolate peanut butter no-bake cookies pair a soft, nutty center with a firm chocolate coating. Coconut flour helps bring the peanut butter and maple syrup together into a dough you can shape by hand, while a dip in melted chocolate gives each cookie a sweet finishing layer. They’re rich enough to serve as dessert, with that familiar chocolate-and-peanut-butter combination in every bite.
The dough takes just five minutes to prepare, though you’ll need extra time for freezing, dipping, and setting the coating. Make a batch for a weekend treat, a party platter, or a holiday dessert tray—no oven required.
Why You’ll Love This Recipe
- Four main ingredients: Coconut flour, peanut butter, maple syrup, and chocolate chips.
- No baking required: The cookies firm up in the freezer and refrigerator.
- Quick dough preparation: Mixing and shaping require little hands-on work.
- Chocolate in every bite: Each cookie gets a complete chocolate coating.
- Easy to customize: The supplied variations include different nut or seed butters, chocolate types, and toppings.
Equipment
- Large baking sheet or plate that fits in your freezer
- Parchment paper
- Large mixing bowl
- Measuring cups
- Sturdy spoon or rubber spatula
- Microwave-safe bowl or double boiler for melting chocolate
- Two forks
Ingredients
Measure the coconut flour carefully, since its absorbency affects how easily the dough holds together.
- ¾ cup coconut flour
- 2 cups peanut butter
- ½ cup maple syrup
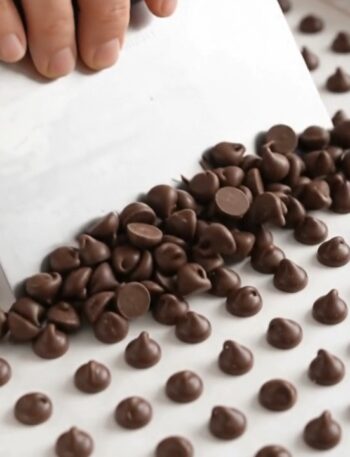
- 2 cups chocolate chips
Ingredient Notes & Substitutions
Coconut flour: Coconut flour absorbs moisture and helps make the filling shapeable. It is not interchangeable cup for cup with almond or all-purpose flour. Because these cookies are not baked, choose a product its manufacturer confirms is suitable for consumption without cooking. Some flour manufacturers require their products to be cooked before eating.
Peanut butter: Mix well before measuring if the oil has separated. The supplied recipe allows almond butter, cashew butter, tahini, or sunflower seed butter instead, but differences in thickness can affect the dough.
Maple syrup: Maple syrup sweetens and moistens the filling. The lower-carb variation uses keto maple syrup; results may vary with the product’s consistency.
Chocolate chips: The recipe allows dark, milk, or white chocolate. Choose your preferred flavor and follow the package’s melting directions, since different chocolates behave differently when heated.
How to Make Chocolate Peanut Butter No-Bake Cookies
- Prepare the tray. Line a large baking sheet or plate with parchment paper and set aside.
- Mix the dough. Combine the coconut flour, peanut butter, and maple syrup in a large bowl. Mix until fully combined, scraping the bottom and sides so no dry pockets remain.
- Shape the cookies. Form the dough into 20 small balls with your hands and place them on the prepared tray. Flatten each ball into a cookie shape.
- Freeze until firm. Place the tray in the freezer until the cookies are firm enough to lift and dip without bending or breaking. An exact freezing time was not provided.
- Melt the chocolate. Once the cookies are firm, melt the chocolate chips using your preferred method and the package directions. Stir until smooth.
- Coat each cookie. Using two forks, dip each cookie into the melted chocolate until completely covered. Lift it out, allow excess chocolate to drip off, and return it to the parchment-lined tray.
- Set the coating. Refrigerate the chocolate peanut butter no-bake cookies until the chocolate has completely firmed up.
Tips for Success
- Check the flour’s intended use. This recipe requires coconut flour suitable for eating without cooking.
- Stir separated peanut butter first. Incorporating the oil before measuring helps create a more consistent dough.
- Mix thoroughly. Coconut flour can collect in dry pockets, so scrape the bowl while stirring.
- Keep the cookies similar in size. Divide the mixture into 20 portions and flatten them to a consistent thickness.
- Freeze before dipping. Soft centers are difficult to coat neatly and may fall apart in the chocolate.
- Let excess chocolate drain. Holding each cookie briefly over the bowl helps prevent a thick puddle around its base.
- Wait until the coating is firm. Moving or stacking the cookies too soon can leave marks in the chocolate.
Variations
These optional changes are separate from the original four-ingredient recipe.
- Lower-carb version: Use keto maple syrup and sugar-free chocolate chips. The final carbohydrate content depends on the products chosen.
- Different nut or seed butter: Replace the peanut butter with almond butter, cashew butter, tahini, or sunflower seed butter. Expect changes in flavor and potentially texture.
- Chocolate swap: Try dark, milk, or white chocolate for the coating.
- Vanilla or cocoa flavor: Add 1 teaspoon of vanilla extract or cocoa powder to the dough, as suggested in the supplied recipe.
- Crunchy or salty finish: Fold in chopped nuts or pretzel pieces, or sprinkle flaky sea salt over the coating before it sets. The source also suggests quick-cooking oats; use them uncooked only if their manufacturer confirms they are ready to eat.
How to Store
Covered Storage
Once the coating is completely set, place the cookies in an airtight container. Separate stacked layers with parchment paper to protect the chocolate.
The supplied recipe lists up to 1 week at room temperature or up to 4 weeks refrigerated. These durations have not been independently verified for the finished cookies, so they should not be treated as guaranteed shelf lives. Refrigeration helps maintain the coating’s firmness, especially in a warm kitchen.
Freezer
The supplied recipe recommends storing the cookies in a freezer-safe zip-top bag for up to 6 months. Pack them carefully to avoid breaking the coating and remove excess air before sealing.
Thaw the portion you want in the refrigerator until the centers are comfortable to bite into. Freezing does not replace any cooking required by an ingredient’s label.
Serving Suggestions
- Add the cookies to a dessert platter with brownies or other small sweets.
- Serve with coffee, tea, or milk for an afternoon treat.
- Include them on a holiday cookie tray.
- Offer them as a sweet finish to a casual dinner or game-day gathering.
Keep the platter away from heat so the chocolate coating stays firm.
Frequently Asked Questions
Are these cookies ready in five minutes?
The dough preparation is listed as 5 minutes, but the finished cookies need additional freezing, chocolate melting, dipping, and refrigeration time. The complete elapsed time was not provided.
Can I replace coconut flour with almond flour?
Not as a direct cup-for-cup substitution. Coconut flour absorbs moisture differently, and the supplied recipe does not include an alternative flour ratio.
Can I use a different nut or seed butter?
Yes. Almond butter, cashew butter, tahini, and sunflower seed butter are listed options. Use the same 2-cup quantity, keeping in mind that consistency and flavor can vary.
Why do the cookies need to be frozen before dipping?
Freezing firms the peanut butter centers so they are easier to lift, turn, and coat without losing their shape.
What type of chocolate works for the coating?
Dark, milk, and white chocolate are all included as options. Follow the melting directions for the chocolate you choose.
How do I know when the cookies are ready to serve?
The chocolate coating should be fully firm and no longer smear when handled gently. Keep refrigerating if any areas remain soft.
Recipe Card
Chocolate Peanut Butter No-Bake Cookies
Equipment
- Large baking sheet or plate
- Parchment paper
- Large mixing bowl
- Measuring cups
- Spoon or rubber spatula
- Microwave-safe bowl or double boiler
- Two forks
Ingredients
- ¾ cup coconut flour
- 2 cups peanut butter
- ½ cup maple syrup
- 2 cups chocolate chips
Ingredient requirement:
- Use coconut flour confirmed suitable for consumption without cooking.
Instructions
- Line a large baking sheet or plate with parchment paper.
- Mix the coconut flour, peanut butter, and maple syrup until fully combined.
- Form into 20 balls, arrange on the tray, and flatten into cookies.
- Freeze until firm.
- Melt the chocolate chips and stir until smooth.
- Using two forks, dip each cookie until completely coated. Let excess chocolate drip off and return to the parchment.
- Refrigerate until the coating has completely firmed up.