Easy No-Bake Lotus Biscoff Cheesecake Recipe

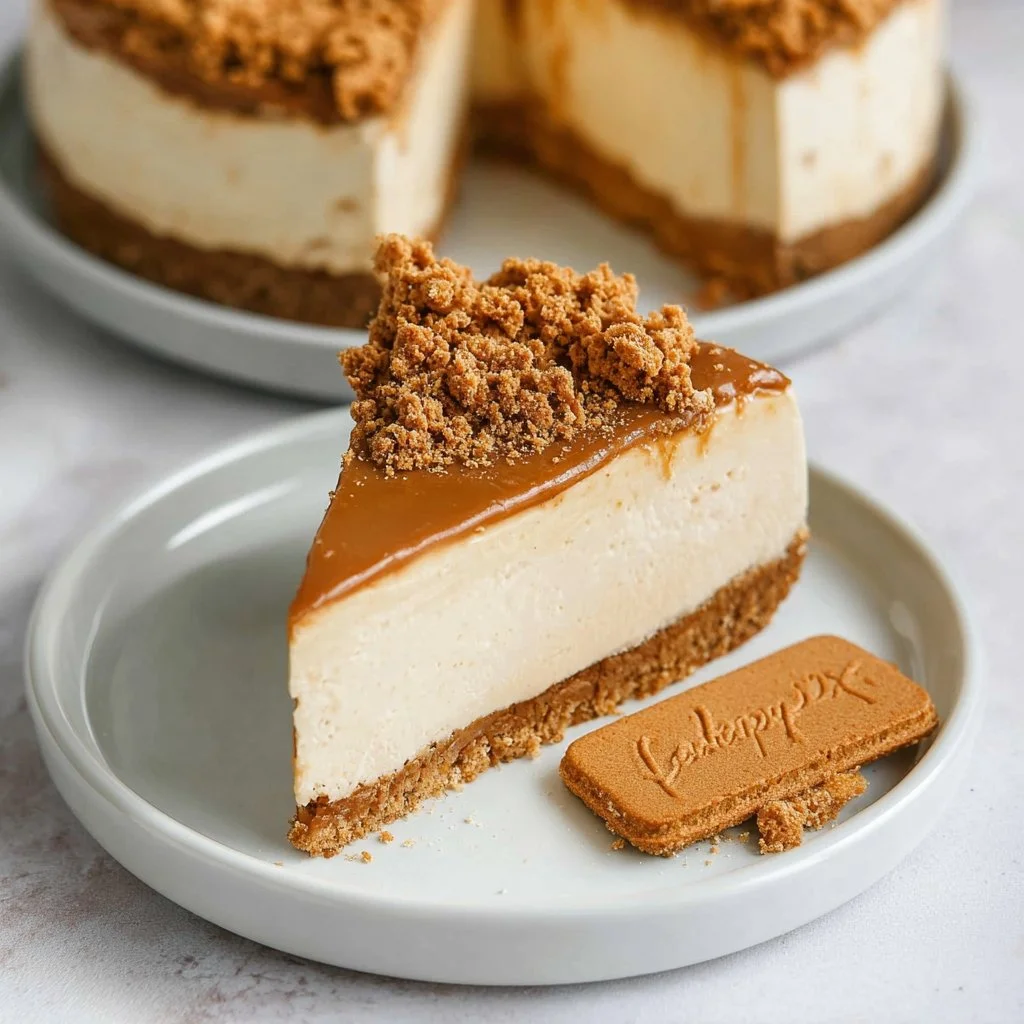
The creamy, indulgent nature of a cheesecake combined with the tantalizing notes of Lotus Biscoff cookies creates an excitement unmatched in the world of desserts. This Easy No-Bake Lotus Biscoff Cheesecake is not just an everyday dessert; it’s a celebration of flavors that tantalize your taste buds and infuse joy into any gathering. Perfect for those who love a sweet treat without the hassle of baking, this cheesecake is an indulgent blend of textures and tastes that will leave everyone wanting more.
Crafting this cheesecake doesn’t require any complicated techniques or arduous baking processes. Instead, it harnesses the crunch of crushed Biscoff biscuits for a base and a luscious cream cheese filling mixed with smooth Biscoff spread. With the delightful aroma of caramelized spices wafting through your kitchen, this no-bake recipe is the epitome of convenience without sacrificing on flavor. Let’s dive into creating a dessert that nobody can resist and that everyone will rave about.
Why make this recipe
The allure of an Easy No-Bake Lotus Biscoff Cheesecake lies not just in its delectable flavor but also in its simplicity. This dessert provides an exceptional way to impress guests without spending hours in the kitchen. The rich, creamy filling complemented by the caramelized taste of Biscoff bisquits makes each bite heavenly, while the convenience of a no-bake cheesecake means you won’t have to preheat that oven. Whether it’s a birthday, a special occasion, or simply a treat for yourself and loved ones, this cheesecake captures the spirit of celebration effortlessly.
Moreover, the versatility of this recipe means it can accommodate a variety of tastes and preferences. With the option to add extra toppings or modifications, you can personalize the cheesecake to fit your desired flavor profile. Additionally, the airy whipped cream mixed into the filling makes it light yet satisfying, ensuring that it can be enjoyed without the weight of traditional desserts. This cheesecake transcends simplicity and is sure to become a staple in your dessert repertoire.
How to make Easy No-Bake Lotus Biscoff Cheesecake Recipe
Making this Easy No-Bake Lotus Biscoff Cheesecake is straightforward and fun, perfect for both novice and experienced bakers alike. The process begins with preparing the biscuit base, where you blitz the Biscoff biscuits until they resemble fine crumbs. Mixing these crumbs with melted butter creates a mixture that, when compacted, forms a secure base for the creamy filling. This step is crucial as it lays the foundation of texture that harmonizes with the smoothness of the cheesecake filling.
Once your base is chilling in the refrigerator, you turn your focus to the creamy cheesecake filling. Combining full-fat cream cheese, icing sugar, and Biscoff spread creates a rich filling that captures the flavors you love. It’s key to beat this mixture until fully combined, allowing for a light and airy texture when you incorporate whipped cream. This addition lightens the mixture, making each slice feel luxurious rather than heavy, while also enhancing the overall flavor profile.
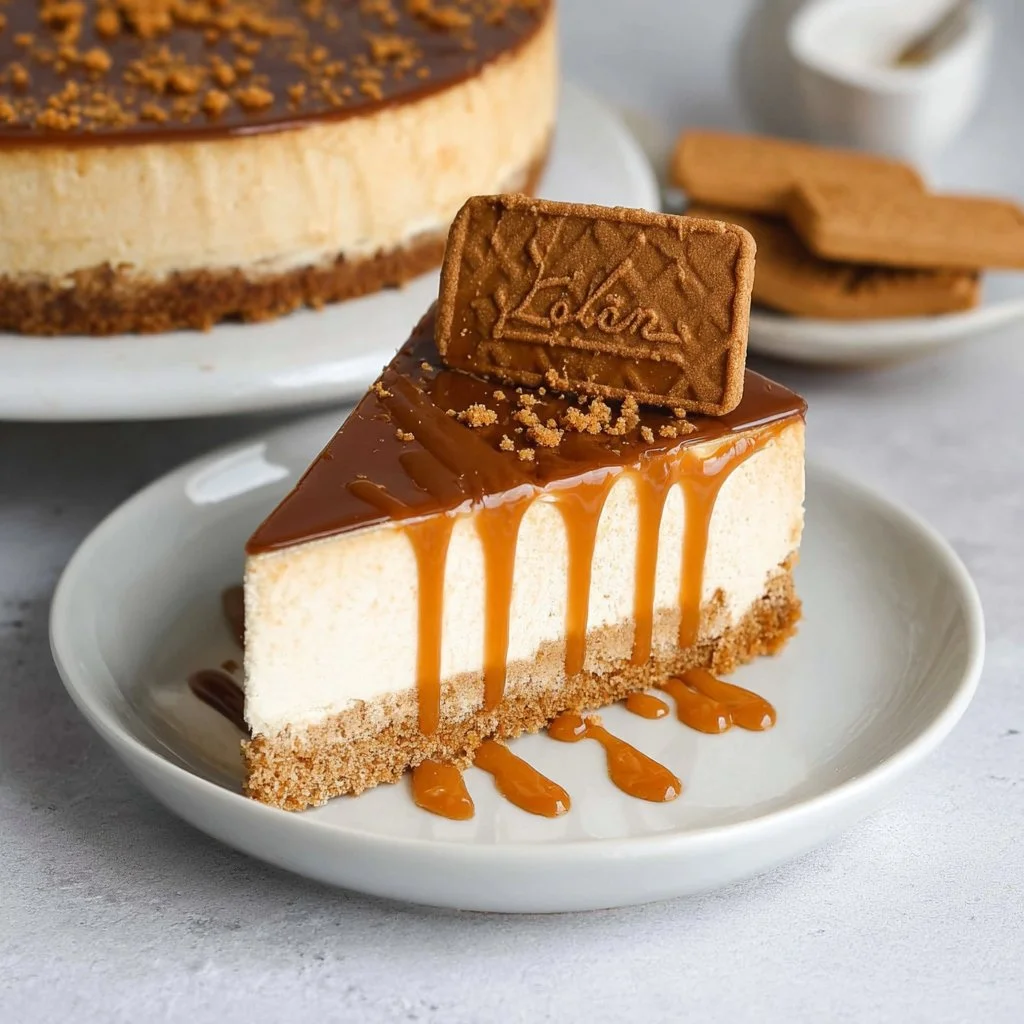
After layering the cheesecake filling onto the biscuit base, patience is vital. Allowing the cheesecake to chill and set for several hours or overnight ensures that the flavors meld beautifully, resulting in a rich, creamy texture. The final touch is the addition of melted Biscoff spread over the top, giving it an attractive sheen and a delightful drizzle effect that elevates both the presentation and taste. The meticulous layering and setting time create a cheesecake that is not just a dessert, but an experience for your palate.
Ingredients
- 300g Biscoff biscuits (2 ½ cups)
- 100g unsalted butter (melted) (7 tbsp)
- 450g full fat cream cheese (I used Philadelphia) (2 cups)
- 75g icing sugar (9 tbsp)
- 250g smooth Biscoff spread (1 cup)
- ½ teaspoon vanilla extract
- 270ml double cream (1 cup + 2 tbsp)
- 150g smooth Biscoff spread (melted and slightly cooled) (2/3 cup)
- Extra Biscoff biscuits and crumbs to decorate (optional)
Directions
- Blitz the Biscoff biscuits in a food processor until broken down into fine crumbs.
- Transfer the crumbs to a mixing bowl and pour in the melted butter. Stir until it resembles wet sand.
- Spread the biscuit/butter mixture into the base of a 20cm springform cake tin. Smooth it out into an even layer, compacting it down with the back of a spoon. Put the tin in the fridge for at least 30 minutes whilst you prepare the cheesecake filling.
- Add the cream cheese, icing sugar, Biscoff spread, and vanilla extract to a large mixing bowl and beat with an electric hand whisk until well combined.
- In a separate bowl, whip the cream until it forms stiff peaks.
- Fold the whipped cream into the other filling ingredients until combined.
- Layer the mixture on top of your biscuit base. It’s easier to do this in two layers rather than tipping it all in so that you can avoid air bubbles. Smooth the top with an offset spatula and then bang once or twice down on the benchtop to get rid of any air bubbles.
- Put in the fridge to set for a minimum of 4-6 hours or preferably overnight.
- Remove the cheesecake from the springform tin by running a sharp knife around the edge of the tin, then gently unclipping the side and lifting it away. Use a cake lifter or two spatulas to lift the cheesecake away from the base of the tin and transfer it to a plate or cake stand.
- Melt the Biscoff spread in short 10-second bursts in the microwave or on a low heat on the stovetop. Pour the melted Biscoff spread all over the top of the cheesecake. You can create a drip effect by gently pushing small amounts of the topping over the edge with a small spoon.
- Add some biscuit crumbs and whole biscuits for decoration if desired.
Time Breakdown
• Preparation Time: 30 minutes
• Cooking Time: 0 minutes
• Baking Time: 0 minutes
• Chilling Time: 4-8 hours
• Rising Time: 0 minutes
• Total Time: 4-8 hours 30 minutes
• Servings: 10
How to serve Easy No-Bake Lotus Biscoff Cheesecake Recipe
Serving this Easy No-Bake Lotus Biscoff Cheesecake is all about highlighting its luxurious texture and flavors. Present it chilled on a lovely cake stand to show off its elegant layers and glossy Biscoff topping. You can slice it into generous pieces, allowing your guests to savor the rich creaminess complemented by the delightful crunch of the biscuit base. A dollop of whipped cream can be added on the side for an extra treat. This cheesecake pairs wonderfully with a hot cup of coffee or with a scoop of vanilla ice cream, amplifying the dessert experience.
For a visually appealing touch, consider garnishing each slice with additional untouched Biscoff biscuits and a sprinkle of crumbs, drawing attention to its signature flavor profile. This cheesecake not only pleases the palate but also provides an impressive centerpiece for your dessert table, making it a stunning addition to any celebration.
How to store Easy No-Bake Lotus Biscoff Cheesecake Recipe
To ensure the freshness of your Easy No-Bake Lotus Biscoff Cheesecake, proper storage is essential. Store it in the refrigerator for up to five days in an airtight container to preserve its creamy texture and rich flavors. If you’ve made the cheesecake ahead of time, it can also be individually sliced and wrapped in plastic wrap for easy grab-and-go servings. Just ensure that it’s well-protected from any strong scents in the fridge, as cheesecakes can absorb those.
For longer storage, you might consider freezing the cheesecake. While the texture can slightly alter when thawed, it remains a delightful option. Place the cheesecake in a freezer-safe container, ensuring it’s tightly sealed, and consume within 2-3 months. To enjoy, thaw the cheesecake in the refrigerator overnight before serving. With these simple storage tips, you can relish this luxurious dessert for days to come.
Tips to make Easy No-Bake Lotus Biscoff Cheesecake Recipe
To elevate your Easy No-Bake Lotus Biscoff Cheesecake beyond its already impressive flavor, consider a few helpful tips. Always opt for full-fat cream cheese for a richer, creamier filling; low-fat versions can lead to a less satisfying texture. When whipping the cream, ensure that your bowl and beaters are chilled to achieve the best results. This little detail can make a significant difference in the stability and lightness of your whipped cream.
If you’re looking to enhance the Biscoff flavor, try adding a bit more smooth Biscoff spread to your filling, or infuse some ground Biscoff biscuits directly into the cream for a delightful crunch in every bite. Creativity can also play a role in presentation. A drizzle of melted Biscoff spread, along with a dusting of crushed biscuits on top, not only adds visual appeal but also intensifies the flavor.
If you find the cheesecake is setting too soft, it might be beneficial to let it cool longer in the refrigerator. Patience can often yield the best results with no-bake desserts. Lastly, remember that dessert is often about sharing; keep it aesthetically pleasing, and you’ll surely impress your guests with this delightful treat.
Variation
No major variations, but you can adjust seasonings to taste.
Nutritional Information (Per Serving)
• Calories: 407 kcal
• Protein: 4 g
• Carbohydrates: 31 g
• Fat: 30 g
• Fiber: 1 g
• Sugar: 17 g
• Sodium: 165 mg
FAQs
Q: Can I use gluten-free biscuits for the base?
A: Yes, you can substitute regular Biscoff biscuits with gluten-free ones, ensuring the cheesecake remains suitable for a gluten-free diet.
Q: How long can I keep the cheesecake in the fridge?
A: The cheesecake can be stored in the refrigerator for up to five days, provided it’s kept in an airtight container.
Q: Can I freeze this cheesecake?
A: Yes, you can freeze the cheesecake for up to 2-3 months. Just make sure it is tightly wrapped to prevent freezer burn.
Easy No-Bake Lotus Biscoff Cheesecake
Ingredients
For the biscuit base
- 300 g Biscoff biscuits
- 100 g unsalted butter (melted) (7 tbsp)
For the cheesecake filling
- 450 g full fat cream cheese (I used Philadelphia) (2 cups)
- 75 g icing sugar (9 tbsp)
- 250 g smooth Biscoff spread (1 cup)
- 0.5 tsp vanilla extract
- 270 ml double cream (1 cup + 2 tbsp)
- 150 g smooth Biscoff spread (melted and slightly cooled) (2/3 cup)
- Extra Biscoff biscuits and crumbs to decorate (optional)
Instructions
Preparation
- Blitz the Biscoff biscuits in a food processor until broken down into fine crumbs.
- Transfer the crumbs to a mixing bowl and pour in the melted butter. Stir until it resembles wet sand.
- Spread the biscuit/butter mixture into the base of a 20cm springform cake tin. Smooth it out into an even layer and compact down with the back of a spoon. Put the tin in the fridge for at least 30 minutes.
- In a large mixing bowl, add the cream cheese, icing sugar, Biscoff spread, and vanilla extract. Beat with an electric hand whisk until well combined.
- In a separate bowl, whip the cream until it forms stiff peaks.
- Fold the whipped cream into the other filling ingredients until combined.
- Layer the cheesecake filling on top of the biscuit base, smoothing the top with an offset spatula. Bang down on the benchtop to get rid of any air bubbles.
Setting
- Put in the fridge to set for a minimum of 4-6 hours, preferably overnight.
- Once set, remove the cheesecake from the springform tin by running a sharp knife around the edge.
- Unclip the side and lift it away. Use a cake lifter or two spatulas to transfer it to a plate.
- Melt the additional Biscoff spread in short bursts in the microwave or on low heat on the stovetop. Pour over the top of the cheesecake and create a drip effect if desired.
- Add some biscuit crumbs and whole biscuits for decoration if desired.